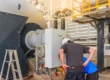
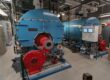
Replacing the expansion tank on a boiler requires careful attention to detail and adherence to proper procedures to ensure the safe and effective operation of the heating system. The expansion tank maintains optimal pressure levels within the boiler system, preventing damage caused by excessive pressure buildup. Here is a comprehensive guide on how to replace the expansion tank on a boiler:
1. Preparation and Safety
Before beginning any work on the boiler system, it is essential to ensure safety by turning off the power to the boiler and allowing it to cool down completely. Additionally, close the water supply valve to the boiler to prevent water from entering the system during the replacement process.
2. Draining the System
To replace the expansion tank, you must drain the boiler system of water to avoid spillage and potential damage. Locate the drain valve on the boiler and attach a hose to direct water away from the area. Open the valve and allow the water to drain completely from the system.
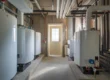
3. Identifying the Expansion Tank
Once you drained the boiler, locate the expansion tank within the system. Depending on the setup, expansion tanks are typically connected to the boiler’s piping and may be located near or elsewhere in the system.
4. Disconnecting the Old Tank
 Relieving any remaining pressure before removing the old expansion tank is crucial. You can do this by carefully opening the valve atop the tank or using a pressure relief valve if one is available. Once the pressure is relieved, use wrenches or adjustable pliers to disconnect the fittings connecting the tank to the boiler’s piping. Be sure to support the tank as you disconnect it to prevent it from falling.
5. Installing the New Tank
Before installing the new expansion tank, check its pressure rating to ensure compatibility with the boiler system. Most expansion tanks come pre-charged with air to a specific pressure level, but adjustments may be necessary based on the system’s requirements. Install the new tank in the exact location as the old one, making sure to securely connect it to the boiler’s piping using fittings and thread sealant as needed.
6. Re-filling and Testing
Once you installed the new expansion tank, close all valves and fittings and re-fill the boiler system with water. Open the water supply valve to allow water to enter the system, and then open the boiler’s pressure relief valve to release any trapped air. Monitor the system’s pressure gauge and adjust the pressure as needed to ensure it falls within the recommended range.
7. Final Checks and Safety Measures
After re-filling the system, check for leaks or abnormalities in the boiler’s operation. Tighten any fittings or connections and ensure all valves are properly closed. Once everything is in order, restore power to the boiler and observe its performance to confirm that the replacement was successful.
In conclusion, replacing the expansion tank on a boiler requires careful planning, preparation, and execution to ensure the heating system’s continued safe and efficient operation. By following proper procedures and safety measures, homeowners, HVAC, and boiler professionals can successfully replace the expansion tank and maintain the integrity of the boiler system. Regular maintenance and monitoring of the expansion tank and boiler are essential for prolonging the lifespan of the equipment and minimizing the risk of malfunctions or breakdowns.
 Call us: 480-797-9349
 Visit: Patriot Boiler